Filters change how a photo looks — warmer, brighter, vintage or black-and-white. In MyCollages a filter applies to the photo inside a specific cell, not to the whole collage at once. So you can treat each shot on its own — or, the other way round, bring every photo to one consistent style.
How to apply a filter
Tap the cell you want to enter its edit mode, then choose “Filters” on the toolbar above it. Changes are visible on the photo instantly — fine-tune the effect while watching the result right on the canvas.
The Filters panel has two modes — ready presets and manual adjustments — and the intensity slider at the bottom controls the strength of the effect, from subtle to strong.
Ready-made presets
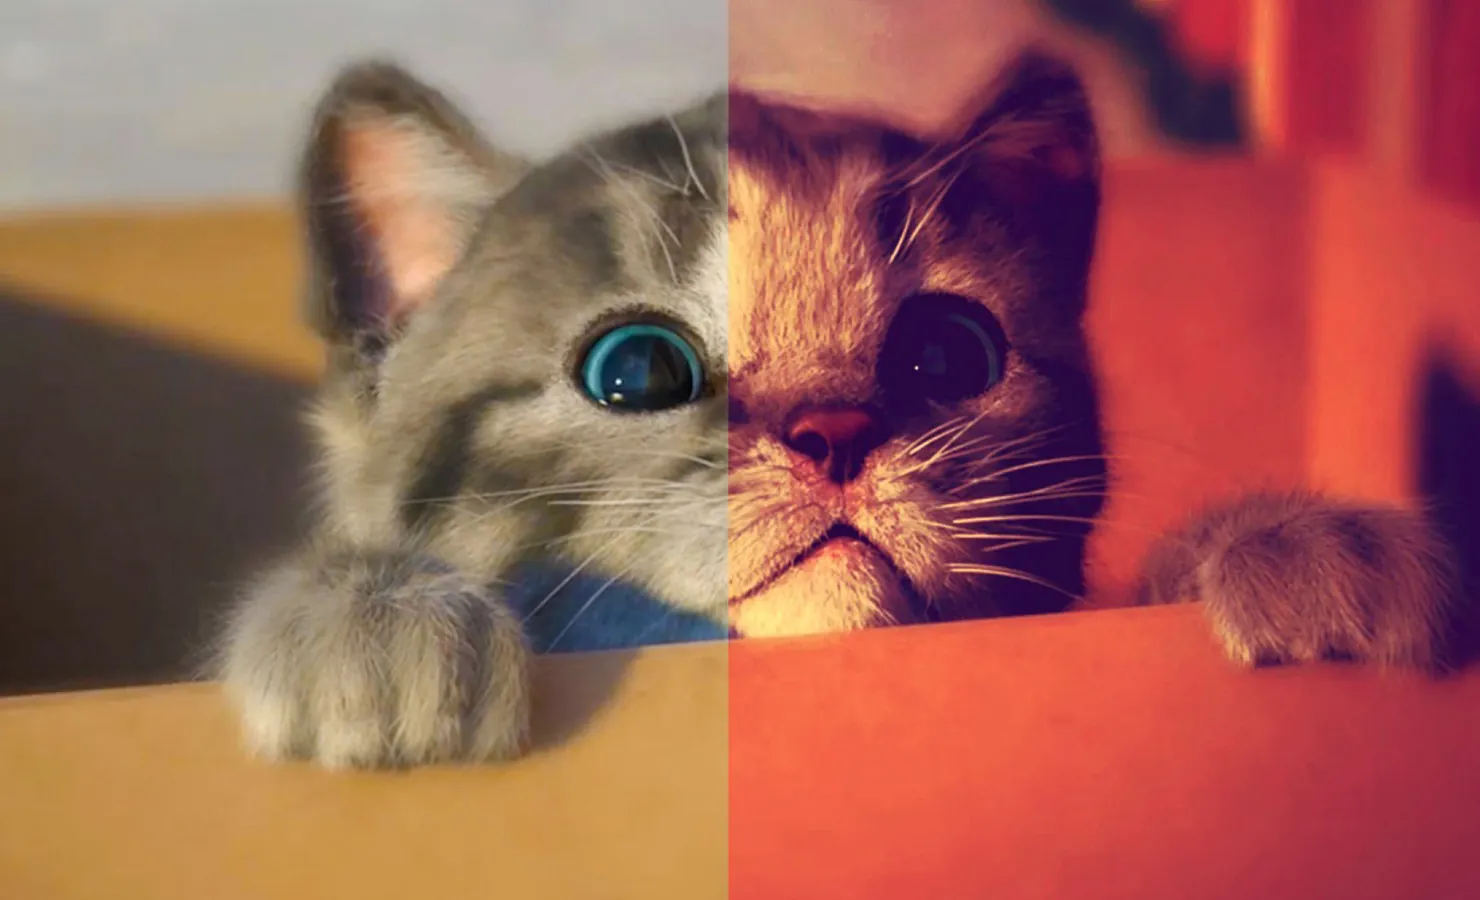
The set has dozens of filters in the style of popular presets — warm, cool, vintage and black-and-white. They apply in one tap: for example, 1977, Clarendon, Lo-Fi, Nashville, Valencia or X-Pro II, plus Inkwell and Moon for black-and-white shots. To remove a filter and return to the untouched look, choose “Original”.
Manual adjustments
When you need precise control, switch to the “Manual” tab — separate sliders set brightness, contrast and saturation (plus a touch of blur). The “Reset to original” button restores the untouched look at any time.
One style for the whole collage
To make the collage feel cohesive, apply similar settings to every cell — the same preset, or close values of brightness and saturation. Then photos taken at different times and in different light will look like a single series.